Call Us

(905) 670-0113

7 Tips for Choosing a Stainless Steel Braided Hose

Choosing the right stainless steel braided hose is more than comparing prices or polished product photos. It affects pressure control, temperature safety, maintenance time, and equipment reliability. A hose that looks strong may still fail when exposed to vibration, chemical fluids, repeated bending, or sudden pressure changes.

Industry research supports this concern. Grand View Research and MarketsandMarkets identify industrial hoses as essential components in manufacturing, chemical processing, energy, and fluid-transfer systems. Their market analyses also highlight rising demand for durable, flexible, and corrosion-resistant hose assemblies. However, market growth does not guarantee product quality. The wrong specification can still create leakage, premature fatigue, or costly shutdowns.

Small details matter.

This guide presents seven practical tips for evaluating a stainless steel braided hose before installation. The recommendations consider working pressure, temperature range, inner-tube material, braid construction, connection type, bend radius, and certification requirements. Standards such as ISO 10380 and ASME B31.3 provide useful technical references, but users must still confirm compatibility with the actual application. A hose installed beside a vibrating pump needs different attention from one used on a clean-water line.

Experienced maintenance teams inspect markings, fittings, and braid condition before accepting delivery. They also review the manufacturer’s pressure ratings under real operating temperatures. That step is often missed. No checklist is perfect, and product brochures may simplify difficult conditions. Careful selection, documented testing, and periodic inspection remain the most reliable safeguards for long service life.
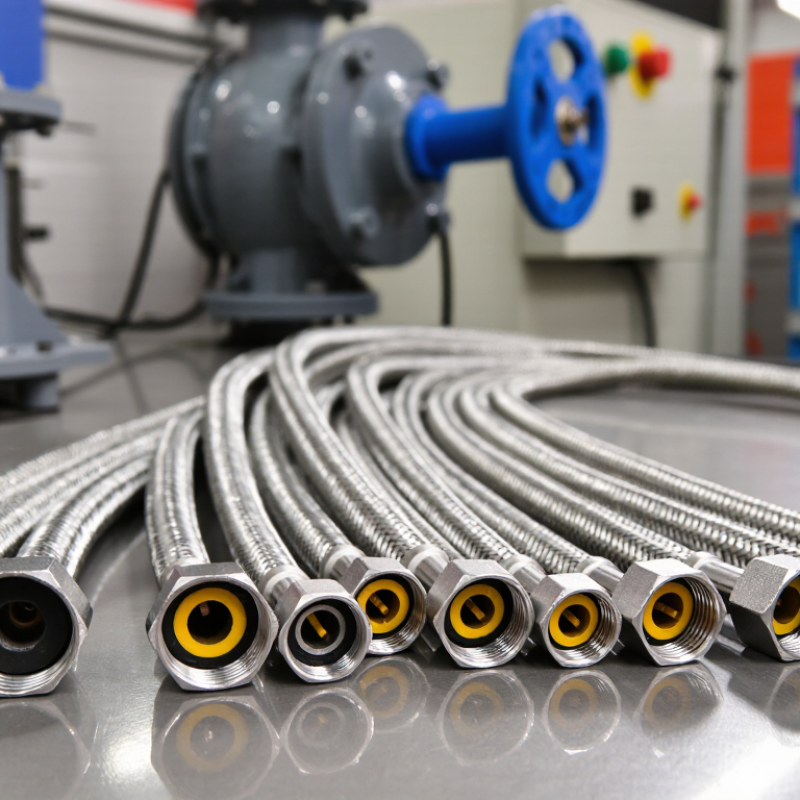
7 Tips for Choosing a Stainless Steel Braided Hose

Identify Hose Construction: 304 vs. 316 Stainless Steel and Braiding Layers

When choosing a stainless steel braided hose, inspect the tube and braid separately. The inner tube carries the fluid, while the braid controls pressure and movement. Grade 304 stainless steel suits clean water, air, and many mild industrial applications. Grade 316 contains molybdenum, giving it stronger resistance to salt, chlorides, and some chemical exposure. It usually costs more. That extra cost may be reasonable near seawater or aggressive cleaning agents.

Tip 1: Match the steel grade to the environment, not just the purchase price. I once saw a 304 braid develop surface staining in a coastal installation. The hose still worked, but the choice deserved more thought. Check fluid temperature, concentration, humidity, and cleaning methods. Ask for material certificates when traceability matters. A sales description alone is not enough.

Tip 2: Count the braiding layers and examine their pattern. A single braid can provide flexibility and moderate pressure support. Double braiding usually improves pressure resistance, crush protection, and durability near moving equipment. However, more layers can make the hose heavier and less flexible. The stated pressure rating must match your operating pressure, temperature, and movement. Do not rely on braid count alone. Verify the hose construction, minimum bend radius, fitting quality, and tested performance. Tiny details matter.

Match Pressure Ratings: Select a Working Pressure with a 4:1 Safety Factor

7 Tips for Choosing a Stainless Steel Braided Hose

Choosing a stainless steel braided hose starts with pressure, not appearance. A polished braid may look strong, yet it does not define the hose’s working limit. Select a working pressure at least four times below the hose’s burst pressure. This 4:1 safety factor helps cover pressure surges, vibration, and uneven installation conditions. Do not treat it as permission to exceed the published rating. Temperature can reduce that margin.

Tip: Check the pressure rating at your actual operating temperature. Heat can weaken the tube, braid, or seal, especially during continuous service. Also compare the rating with pump start-up spikes and water-hammer events. Measure them if possible. One overlooked detail is fitting compatibility. Threads, seals, and connection geometry must match the hose assembly. A hose rated for 1,000 psi may fail early when its fittings are misaligned or poorly crimped.

Tip: Leave room for movement, but never use the hose as a lever or support. During field checks, look for flattened braid, kinks, corrosion, and wetness near fittings. I have seen an apparently sound hose fail after repeated bending at one short section. That experience changed my inspection habits. Record the medium, temperature, pressure, and installation angle before selecting a replacement. Then confirm the complete assembly rating, not only the stainless braid. Small assumptions become expensive when pressure is trapped.

Verify Temperature Limits: Compare Media Conditions with −196°C to 540°C Ratings

A stainless steel braided hose may be rated from −196°C to 540°C, but that range is not automatically safe for every installation. Treat it as a starting point, not a promise. Check the actual media temperature, pressure, flow, and exposure time. Liquid nitrogen near −196°C behaves differently from hot gas at 540°C. Short bursts and continuous service can create very different stresses. This distinction is easy to miss.

Review the complete assembly, not only the braid. The core tube, fittings, seals, and welding method may have narrower limits. Confirm whether the rating applies to the hose, the connections, or the finished assembly. Ask for tested data when thermal cycling is expected. Repeated movement between room temperature and cryogenic conditions can stiffen materials and loosen connections. I once focused too heavily on the headline temperature range. That was a poor shortcut.

Measure real operating conditions at the hose wall when possible. Measure the wall. Add margin for start-up spikes, radiant heat, vacuum, and cleaning cycles. At high temperatures, insulation may trap heat instead of reducing it. At low temperatures, frozen moisture can hide fitting damage. Use current technical documentation and request qualified engineering review for critical systems. Recheck the calculation whenever the process changes. The first estimate may be wrong.

Calculate Size and Bend Radius: Prevent Flow Loss and Kinking During Installation

Choosing a stainless steel braided hose starts with accurate measurements, not guesswork. Record media, temperature, pressure, connection type, and available space. Measure inside diameter based on required flow, not the pipe thread alone. A narrow hose can create pressure loss, heat, and unwanted noise. Oversizing may improve flow, but it can complicate routing and raise cost. I once saw a short connection fail because the installer measured fittings, not the flowing passage. That mistake was small, but expensive.

Estimate flow velocity with Q = A × v, then compare it with the equipment maker’s recommended range. For water service, many installers target moderate velocity, although the correct limit depends on fluid and system design. Check pressure drop across the full assembly, including bends and end fittings. Do not treat the braid as a pressure-loss calculator. It reinforces the tube; it does not remove friction. Leave enough length for movement, but avoid using extra hose as a loose loop. That looks flexible. It may sag and vibrate.

Bend radius is measured from the hose centerline to the bend, not its outer edge. Use the supplier’s minimum static and dynamic radius values. During installation, keep the first bend beyond the fitting’s straight section. Never twist the hose to align threads. Rotate the assembly or change the routing. A simple cardboard template can expose a tight turn before metal is installed. Recheck clearance after pressure testing, because the hose may shift slightly. My checklist still needs improvement: I sometimes record nominal size but forget actual clearance. That omission can defeat careful calculations.

7 Tips for Choosing a Stainless Steel Braided Hose - Calculate Size and Bend Radius: Prevent Flow Loss and Kinking During Installation
Engineering reference table for preliminary hose selection. Flow values below are theoretical capacities based on internal diameter and average fluid velocity; actual results depend on fluid properties, fittings, hose construction, temperature, and system pressure.
Tip Key Dimension Reference Data Selection and Installation Action Problem Prevented
1 Measure the required flow Typical preliminary liquid velocity ranges:
2 m/s for low-pressure-loss planning
3 m/s for a general liquid-service estimate
5 m/s for compact, higher-velocity layouts
Start with the required flow rate, then calculate the minimum internal diameter: D = √(4Q ÷ πV)
Where D is internal diameter, Q is volumetric flow, and V is target velocity.
Undersizing, excessive pressure drop, noise, and inadequate equipment performance.
2 Match the actual inside diameter Common nominal hose sizes and approximate internal diameters:
1/4 in: 6.4 mm
3/8 in: 9.5 mm
1/2 in: 12.7 mm
3/4 in: 19.1 mm
1 in: 25.4 mm
Select by actual internal diameter rather than outside diameter. Confirm the bore at the hose and fitting connection because liner thickness and end construction can change the effective passage. Flow restriction caused by selecting a hose from outside diameter or nominal thread size alone.
3 Check flow capacity Approximate flow capacity at a target velocity:
6.4 mm ID: 3.86 / 5.79 / 9.65 L/min
9.5 mm ID: 8.51 / 12.76 / 21.26 L/min
12.7 mm ID: 15.20 / 22.80 / 38.00 L/min
19.1 mm ID: 34.38 / 51.56 / 85.94 L/min
25.4 mm ID: 60.80 / 91.20 / 152.00 L/min
Values are for 2 / 3 / 5 m/s respectively.
Use the next larger bore when the required flow is close to the calculated limit, especially when the assembly includes long runs, elbows, valves, quick couplings, or restrictive end fittings. Unexpected flow loss caused by fittings and local resistance in the complete assembly.
4 Calculate bend radius Preliminary planning radius using 6 × internal diameter:
6.4 mm ID: approximately 38 mm
9.5 mm ID: approximately 57 mm
12.7 mm ID: approximately 76 mm
19.1 mm ID: approximately 115 mm
25.4 mm ID: approximately 152 mm
Keep the bend centerline radius at or above the applicable hose specification. Measure the radius from the center of the bend to the hose centerline, not to the inner wall. Kinking, flattened bore, reduced flow area, and premature braid or liner damage.
5 Allow movement and routing length For a moving assembly, include:
Static length: installed end-to-end distance
Movement allowance: thermal, vibration, or equipment travel
Service loop: extra length needed to preserve the minimum bend radius
Do not install the hose fully stretched. Avoid torsion by aligning the fittings before tightening and route the hose in one natural plane wherever possible. Axial overloading, twisting, fitting leakage, and fatigue from repeated movement.
6 Check pressure, temperature, and media Required verification points:
Working pressure: system maximum including surges
Temperature: continuous and transient limits
Media: chemical compatibility with the liner, tube, braid, and seals
Use the lowest applicable rating after considering temperature derating, pulsation, vacuum conditions, pressure spikes, and the selected end connections. Never use burst pressure as the operating rating. Premature failure, permeation, corrosion, seal degradation, and unsafe pressure release.
7 Protect the hose during installation Installation controls:
Minimum bend radius: maintain throughout the full motion range
Support: prevent unsupported weight and abrasion
Clearance: keep away from sharp edges, hot surfaces, and pinch points
Install bend guides or elbows where necessary. Tighten fittings without rotating the hose, inspect the braid for damage, and perform a controlled leak and pressure check before service. Installation-induced kinking, abrasion, leakage, and hidden damage to the braided reinforcement.
Calculation note: Flow values use Q = V × πD²/4 and are rounded to two decimal places. The 6×ID bend-radius value is a preliminary layout guideline, not a universal minimum. Always verify the permitted bend radius, pressure rating, temperature rating, vacuum capability, and end-fitting requirements for the specific hose construction being installed.

Check Standards, End Fittings, and Service Life Before Final Selection

Choosing a stainless steel braided hose requires more than matching diameter and appearance. Check the required pressure, temperature range, fluid compatibility, and movement conditions. A hose rated for water may fail quickly with oil, steam, or aggressive chemicals. Verify applicable standards and certificates for your market. Ask for traceable test records, not only a sales claim.

End fittings deserve close attention. Confirm thread type, connection size, sealing method, and metal compatibility. A perfect hose can leak when its fitting is mismatched. Inspect the crimp area for uneven compression, exposed wires, or sharp edges. Keep the bend radius generous. Do not force the hose into alignment. It should not carry pipe weight or absorb constant twisting. Small installation errors often become expensive failures.

Service life depends on heat, vibration, pressure cycles, and external abrasion. Record the installation date and inspect the hose during planned maintenance. Look for broken braid wires, corrosion stains, kinks, bulges, and fitting movement. Replace damaged assemblies early. Waiting for leakage is poor practice. No hose lasts forever.

The right choice also includes spare availability and clear replacement criteria. This is where selection becomes less certain. Actual site conditions can differ from laboratory ratings. Recheck the specification after installation, especially when temperatures fluctuate. A careful review may feel slow, but it is cheaper than an unexpected shutdown.