How to Use a Power Air Fryer?
Using a Power Air Fryer can make everyday cooking faster, cleaner, and more predictable. This guide explains how to prepare the appliance, choose suitable temperatures, and cook food evenly. You will learn practical steps for fries, vegetables, chicken, fish, and reheated meals. Small details matter. A crowded basket can leave the center soft while the edges become too dark.
Before cooking, place the fryer on a stable, heat-resistant surface. Check that the basket and drawer are dry and correctly fitted. Preheating may improve browning, although some recipes do not require it. Follow the manufacturer’s instructions for your specific model. Power Air Fryer designs can differ in capacity, controls, and recommended cooking times.
Start with modest portions. Lightly coat fresh ingredients with oil when appropriate, then arrange them in a loose layer. Shake the basket halfway through cooking. Use a food thermometer for meat and poultry, because color alone cannot confirm safe doneness. Keep the cooking area clear, and avoid touching hot surfaces without protection.
Expect a learning curve. Your first batch may cook unevenly. That is normal. Record the temperature, time, and portion size after each attempt. This simple habit helps you adjust future recipes with confidence. Cleaning the basket after it cools also prevents old grease from affecting flavor. A Power Air Fryer is convenient, but it still rewards attention, sensible portions, and careful judgment.
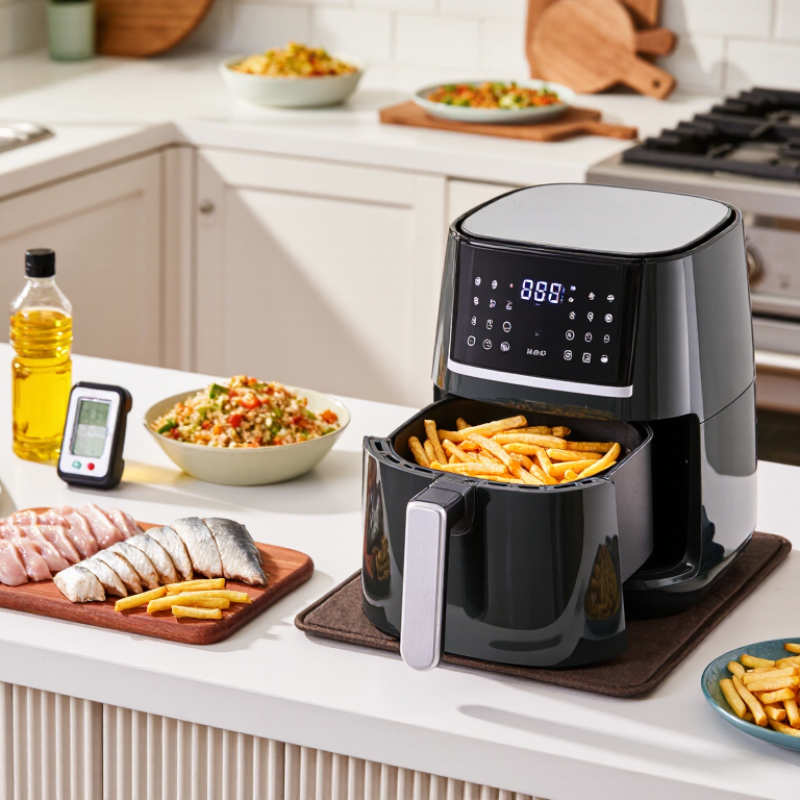
Understanding the Power Air Fryer’s Main Parts and Controls
A power air fryer is easier to use when you know what each part does. The cooking basket holds food, while the removable crisper plate lifts it above the basket floor. That gap lets hot air move underneath, so fries brown more evenly. The drawer should slide fully into place before cooking; many models will not heat otherwise. Keep the air intake and rear exhaust clear. A wall or hanging towel too close can block airflow.
The control panel usually sets temperature and time, with preset buttons for common foods. Presets are starting points, not promises. A crowded basket or thick chicken pieces may need more time, so check the food rather than trusting the display. The USDA’s safe-temperature chart specifies 165°F (74°C) for poultry; use a food thermometer in the thickest part. That detail matters. The timer may stop, but it cannot confirm the center is cooked. Many units draw around 1,400–1,700 watts, so check the rating label before using an extension cord. I still find the controls less intuitive than they look. A quick test with a small batch helps you learn how your own appliance behaves.
Preparing the Appliance and Ingredients for Cooking
Before cooking, place the air fryer on a dry, level countertop with open space around its vents. Keep it away from curtains and the edge of the counter. Check the appliance’s manual for clearance and preheating instructions, since designs vary. Make sure the basket and cooking tray are clean and completely dry before fitting them into the unit. A damp basket can leave water beneath the food, where crisping matters most. If the recipe calls for preheating, set the temperature and let the appliance run for the stated time. Don’t guess at settings when the manual gives specific guidance.
Prepare ingredients in pieces of similar size so they cook at roughly the same pace. Pat vegetables, fish, or potatoes dry with a clean towel; excess moisture can soften the surface. Add a light coating of oil only when needed, and toss ingredients in a bowl for more even coverage. A teaspoon can go a long way. Leave room for hot air to move around each piece, rather than packing the basket tightly. I sometimes want to fit in one extra handful, but crowded food tends to brown unevenly. Check that ingredients are suitable for the recipe and remove loose crumbs or excess marinade before loading the basket.
Choosing Temperature and Time for Different Foods
Choosing temperature and time is less like setting an oven and more like watching a small, fast-moving cooking space. For crisp potato wedges, try 400°F for 18–22 minutes, shaking the basket halfway through. Frozen fries often need 380°F for 12–18 minutes, but thickness changes everything. For chicken breast, start around 375°F and check after 16 minutes; thicker pieces may need longer. Use a food thermometer, not color alone: poultry should reach 165°F at the center. Small cuts cook quickly. Check early.
Fish needs a gentler touch. Try 350°F for 8–12 minutes, depending on thickness, and look for flesh that flakes easily. Vegetables such as broccoli or sliced zucchini usually do well at 375°F for 8–12 minutes, with a light coating of oil. Keep pieces similar in size so they finish together. Avoid packing the basket tightly; hot air needs room to move. I sometimes expect the printed time to be exact, and it rarely is. Basket size, starting temperature, and food thickness all matter. Make a small adjustment, then check again rather than adding several minutes at once.
How to Use a Power Air Fryer: Temperature and Time by Food
These are practical starting points for a preheated air fryer. Cooking times vary by appliance, portion size, and food thickness; check for doneness and adjust as needed. For food safety, cook chicken to an internal temperature of 74°C (165°F).
Cooking, Checking, and Adjusting Food as Needed
Using a power air fryer well means watching the food, not merely setting a timer. Preheat for three minutes if the recipe recommends it. Pat vegetables and meat dry before cooking. This improves browning and reduces excess moisture. Arrange food in a single layer, leaving space around each piece. Crowding often creates soft edges instead of crisp surfaces.
Cooking times are only estimates. Check small foods halfway through the cycle. Shake the basket gently, or turn larger pieces with tongs. Look for golden edges, bubbling cheese, or firm vegetable centers. For poultry and other meats, use a food thermometer in the thickest part. Do not rely only on color. I sometimes trust the timer too much, and the result is uneven. That mistake taught me to check earlier.
Tips
Keep notes about temperature, cooking time, and portion size. If food browns too quickly, lower the temperature by 10–15°C. If it looks pale, add two or three minutes, then check again. A light oil coating can improve texture, but too much oil may cause smoke. Let cooked food rest briefly on a plate or rack. This prevents steam from softening the crust. Small adjustments usually work better than changing everything at once.
Cleaning and Storing the Air Fryer Safely
How to Use a Power Air Fryer: Cleaning and Storing the Air Fryer Safely
Cleaning should begin after the appliance cools completely. I unplug it immediately, then wait before touching the basket or heating area. Removing the basket and tray makes hidden crumbs easier to find. I wash these parts with warm water, mild dish soap, and a soft sponge. Metal scouring pads can damage the surface. I wipe the cooking chamber with a barely damp cloth. Water should never enter the electrical unit. Dry every part fully before reassembly. Moisture trapped underneath can create unpleasant odors and affect performance.
Tips: Check the heating element for grease or crumbs. Use a soft, dry brush when needed. Never spray cleaner directly inside. I once stored a tray while it was slightly damp, and the next use smelled stale. That mistake reminded me to slow down. Inspect the cord and plug regularly. Stop using the appliance if you notice melting, exposed wires, or unusual heat.
Store the fryer in a clean, dry, ventilated cabinet. Keep the cord loosely coiled, not tightly wrapped around the body. Leave the basket slightly open if the interior remains warm. Avoid placing heavy items on top, because they may press against the controls. Keep the appliance away from sinks, steam, and children’s reach. Before using it again, confirm that the basket is dry and properly seated. I still occasionally miss a corner, so a quick light check helps.
